


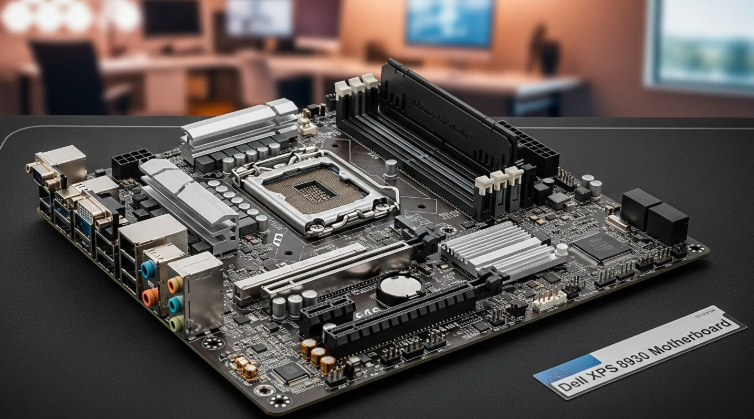
Flashing the BIOS on your B650 Pro motherboard is a crucial process that can unlock new features, improve system stability, and ensure compatibility with the latest hardware. Whether you’re a beginner or an experienced builder, understanding the correct flashing procedure helps you avoid costly mistakes that could brick your board.
In this guide, we will walk you through Things to Do Before Flashing BIOS and How to Fix BIOS Update Errors to ensure a smooth and successful update experience.
What Is BIOS on a Motherboard?
BIOS stands for Basic Input Output System. It is the firmware installed on the motherboard that starts your computer and manages communication between hardware components such as the CPU, RAM, storage drives, and graphics card.
When you power on the PC, the BIOS checks if all hardware is functioning correctly before loading the operating system. Modern motherboards technically use UEFI firmware, but most people still call it BIOS because the term is widely recognized.
What Does Flashing a B650 Pro Motherboard Mean?
Flashing a motherboard means updating or reinstalling the BIOS firmware with a newer version provided by the motherboard manufacturer. The update replaces the older firmware and can improve compatibility, stability, and hardware support.
When searching for how to flash B650 Pro motherboards, users usually want to update the BIOS to support newer AMD Ryzen processors, fix bugs, improve RAM performance, or solve boot-related issues.
Benefits of Flashing BIOS
Updating the BIOS can provide several improvements depending on the motherboard model and firmware version. While it does not always increase FPS dramatically, it can improve system reliability and hardware compatibility.
Some common benefits include:
| Benefit | Explanation |
| Better CPU Support | Supports newly released Ryzen processors |
| Improved RAM Compatibility | Helps high-speed DDR5 RAM run more stable |
| Stability Fixes | Reduces crashes, freezes, and boot problems |
| Security Updates | Fixes known firmware vulnerabilities |
| Faster Boot Times | Some BIOS updates improve startup performance |
| Hardware Optimization | Better communication between components |
For gamers and content creators, BIOS updates can also help reduce memory instability and improve overall responsiveness.
Things to Do Before Flashing BIOS
Before starting the BIOS update, it is important to prepare everything carefully. A failed BIOS update caused by power interruption or wrong firmware can create serious boot problems.
Check Your Motherboard Model
First, confirm the exact motherboard model. Many B650 motherboards have similar names, but they use different BIOS files. Installing the wrong firmware can damage the BIOS installation.
You can check the motherboard model by:
- Looking at the motherboard box
- Reading the label on the board
- Using system information tools in Windows
Check Current BIOS Version
Knowing the installed BIOS version helps determine whether you actually need an update. Sometimes your motherboard already has the latest stable version installed.
You can find the BIOS version:
- Inside the BIOS menu
- Through System Information in Windows
- Using motherboard software utilities
Ensure Stable Power Supply
Power interruption during flashing is one of the biggest risks. If possible, connect the computer to a UPS system before starting the update.
Avoid flashing BIOS during storms or unstable electricity conditions because sudden shutdowns may corrupt the firmware.
How to Download the Correct BIOS File?
Downloading the correct BIOS file is one of the most important steps in learning how to flash a B650 Pro motherboard safely. Every motherboard manufacturer provides BIOS files on its official support page.
Follow these steps carefully:
- Visit the official motherboard manufacturer website
- Search for your exact motherboard model
- Open the support or downloads section
- Select the BIOS category
- Download the latest stable BIOS version
After downloading the file, extract the ZIP folder because BIOS files are usually compressed.
Never use BIOS files from unofficial websites because modified or incorrect firmware can damage your motherboard.
Preparing a USB Drive for BIOS Update
A USB flash drive is required for most BIOS update methods. The drive must be formatted correctly so the motherboard can detect the BIOS file properly.
Format USB to FAT32
Most motherboards require the USB drive to use FAT32 format. NTFS or exFAT may not work during BIOS flashing.
Copy BIOS File Correctly
After extracting the BIOS folder:
- Copy the BIOS file to the root directory of the USB drive
- Do not place it inside another folder
- Rename the BIOS file if the manufacturer requires it
Some motherboards require special filenames such as:
| Brand | Possible BIOS Filename |
| MSI | MSI.ROM |
| Gigabyte | GIGABYTE.BIN |
| ASUS | Specific renamed file |
| ASRock | Usually original filename |
Always read the motherboard instructions carefully before proceeding.
How to Flash B650 Pro Motherboard Through BIOS Menu?
Modern B650 motherboards include built-in BIOS update utilities that make the flashing process easy. Different manufacturers use different names for these tools, but the process is very similar.
The update process usually takes between 5 and 10 minutes depending on the motherboard and BIOS version.
Enter BIOS Setup
Restart the computer and repeatedly press the BIOS key during startup. Common BIOS keys include:
- Delete
- F2
- F10
Once inside the BIOS menu, locate the BIOS update utility.
Start the BIOS Update
Insert the prepared USB drive and open the update tool. Select the BIOS file from the USB storage and confirm the update process.
The screen may restart several times during installation. This is normal behavior and should not be interrupted.
Wait for Completion
Do not turn off the computer while flashing is in progress. Interrupting the process can corrupt the motherboard firmware.
After completion, the motherboard usually restarts automatically.
MSI M-Flash vs ASUS EZ Flash vs Gigabyte Q-Flash
Different motherboard manufacturers use different BIOS update tools, but they all perform similar functions.
| Brand | BIOS Utility | Main Feature |
| MSI | M-Flash | Beginner-friendly interface |
| ASUS | EZ Flash | Integrated inside BIOS |
| Gigabyte | Q-Flash | Reliable USB BIOS updates |
| ASRock | Instant Flash | Automatic BIOS file detection |
MSI M-Flash is known for its simple interface, while Gigabyte Q-Flash is popular for stable updates. ASUS EZ Flash provides smooth BIOS installation directly through the BIOS menu without requiring extra software.
Important Safety Tips During BIOS Update
Updating BIOS is safe when performed correctly, but users should still follow important precautions to avoid system problems.
Some essential safety tips include:
- Never turn off the PC during flashing
- Avoid removing the USB drive during update
- Use the correct BIOS file only
- Do not press keyboard buttons during installation
- Avoid overclocking before updating BIOS
If the motherboard supports BIOS Flashback, it provides an additional recovery option in case something goes wrong.
Common BIOS Flashing Problems
Although BIOS updates are usually successful, some users may experience issues during the process. Most problems are caused by incorrect BIOS files or improperly formatted USB drives.
BIOS File Not Detected
This usually happens when:
- USB is not FAT32 formatted
- BIOS file is inside a folder
- Incorrect BIOS version was downloaded
PC Stuck During BIOS Update
Sometimes the screen appears frozen for several minutes. Users should avoid restarting immediately because some BIOS installations take longer.
System Not Booting After Update
A failed boot may happen because BIOS settings reset after flashing. In many cases, loading optimized defaults or clearing CMOS fixes the issue.
How to Fix BIOS Update Errors
Most BIOS flashing problems can be fixed with simple troubleshooting steps. Staying calm and following the correct procedure is important.
Clear CMOS
Resetting CMOS restores default BIOS settings and may solve boot issues after flashing.
Reformat USB Drive
Formatting the USB drive again using FAT32 often helps the motherboard detect the BIOS file correctly.
Download BIOS Again
Corrupted BIOS downloads can cause update failures. Downloading the file again from the official website may solve the problem.
Use Another USB Port
Some motherboards prefer specific USB ports for BIOS flashing, especially Flashback ports marked on the rear I/O panel.
What to Do After Flashing BIOS?
After successfully updating the BIOS, users should verify that everything is functioning correctly before using the system normally.
Recommended steps after BIOS flashing include:
| Task | Purpose |
| Load Optimized Defaults | Ensures stable BIOS settings |
| Enable EXPO/XMP | Restores RAM speed profiles |
| Check CPU Temperatures | Confirms proper cooling |
| Verify BIOS Version | Confirms successful update |
| Reconfigure Fan Curves | Restores custom cooling settings |
Some BIOS updates reset all custom settings, so users may need to re-enable overclocking or fan profiles manually.
Can BIOS Updates Improve Gaming Performance?
BIOS updates can improve gaming performance indirectly by improving hardware compatibility and system stability. However, users should not expect massive FPS increases from a BIOS update alone.
Performance improvements are usually related to:
- Better RAM optimization
- Improved CPU communication
- Reduced system stuttering
- Faster boot and loading times
For Ryzen systems, BIOS updates can significantly improve DDR5 memory stability and processor efficiency.
Risks of Updating BIOS
Although modern BIOS flashing tools are safer than older methods, there are still risks involved if the process is interrupted or performed incorrectly.
Common risks include:
| Risk | Description |
| Power Failure | May corrupt BIOS firmware |
| Wrong BIOS File | Can prevent motherboard from booting |
| Failed Update | May require BIOS recovery |
| Instability | Rarely, new BIOS versions introduce bugs |
These risks are usually low when users follow official instructions carefully.
When You Should Not Update BIOS
Not every computer needs a BIOS update. If your system is stable and fully compatible with your hardware, updating BIOS may not provide noticeable benefits.
You may avoid updating BIOS if:
- Your PC runs perfectly without issues
- No new hardware support is needed
- The update only contains minor changes
- You are uncomfortable with BIOS procedures
In many cases, “if it is not broken, do not fix it” is a reasonable approach for casual users.
FAQs
Can I flash BIOS with all PC parts installed?
Yes, you can update the BIOS while all components are installed normally. Most users flash BIOS with the CPU, RAM, GPU, and storage connected without any issues.
Does BIOS flashing delete Windows or personal files?
No, updating the BIOS does not remove Windows, games, or personal files because the BIOS firmware is stored separately from your storage drive.
Can I use a USB 3.0 drive for BIOS flashing?
Yes, many motherboards support USB 3.0 drives, but some older BIOS tools work more reliably with USB 2.0 flash drives.
Should I remove overclock settings before updating BIOS?
Yes, it is recommended to disable CPU or RAM overclocking before flashing BIOS to reduce the risk of crashes during the update process.
Can BIOS updates fix RAM instability issues?
Yes, many BIOS updates improve DDR5 memory compatibility and stability, especially on newer AM5 motherboards like B650 series boards.
Is the internet required during BIOS flashing?
No, the internet is only needed to download the BIOS file. The actual BIOS flashing process works offline using a USB drive.
Can I downgrade BIOS to an older version?
Some motherboards allow BIOS downgrades, while others block older firmware versions for security or compatibility reasons.
Conclusion
Learning how to flash B650 Pro motherboards is important for improving hardware compatibility, fixing stability problems, and supporting newer Ryzen processors. Modern B650 motherboards make the BIOS update process much easier with built-in tools like M-Flash, EZ Flash, and Q-Flash.
Although BIOS updates usually do not give huge FPS boosts, they can improve system performance, memory stability, and boot reliability. Following the correct steps carefully helps reduce risks and ensures a safe and successful BIOS flashing process.